

You've probably done this already. You clamp a straight board to a sheet of plywood, run the saw down it, and still end up with a cut that walks off the line by the time you hit the far end. The problem usually isn't your hands. It's that the guide was never calibrated to your saw's blade-to-shoe offset, so the setup was wrong before the motor even spun.
That's why a solid circular saw cutting guide DIY build starts with your specific saw, not a random scrap board. The basic idea is simple. Measure the distance from blade to shoe, build or place the fence to match that offset, trim the guide with the saw itself, and let the guide edge become the cut line. That method matters because mainstream how-to content often skips the offset step even though woodworking guides call it the most critical part of a straight-cut guide build, and that's exactly why many homeowners get crooked results with a clamped straightedge (Woodwork Starter on offset setup).
Circular saws have been around a long time, from the earliest widely attributed patent by Samuel Miller in 1777 through portable circular saws entering use in 1929, which is when straight-cut guidance got a lot more useful for jobsite and home work (historical saw reference.pdf)). And from a safety standpoint, control matters. A U.S. government review reported 1,483 personal-injury incidents across power-saw categories in FY 1973, with portable circular saws accounting for 89 cases, and later medical research estimated 1.38 million upper-extremity saw injuries presenting to emergency departments from 2003 to 2022 (U.S. safety and injury review). A guide won't replace basic saw handling, but it does give the saw a path to follow instead of asking you to freehand sheet goods in the dust and heat.
Know Your Saw Before the First Cut
Most crooked cuts start with a bad assumption. People assume any straightedge works with any saw. It doesn't. A circular saw cutting guide DIY setup only tracks right when the guide matches the geometry of the saw you're using.
Start with the saw unplugged, or pull the battery if it's cordless. Set the shoe flat on something you trust, like a factory edge of plywood or another verified straight, flat board. Then measure from the blade edge to the edge of the shoe that will ride the guide. Don't eyeball it off the front notch.
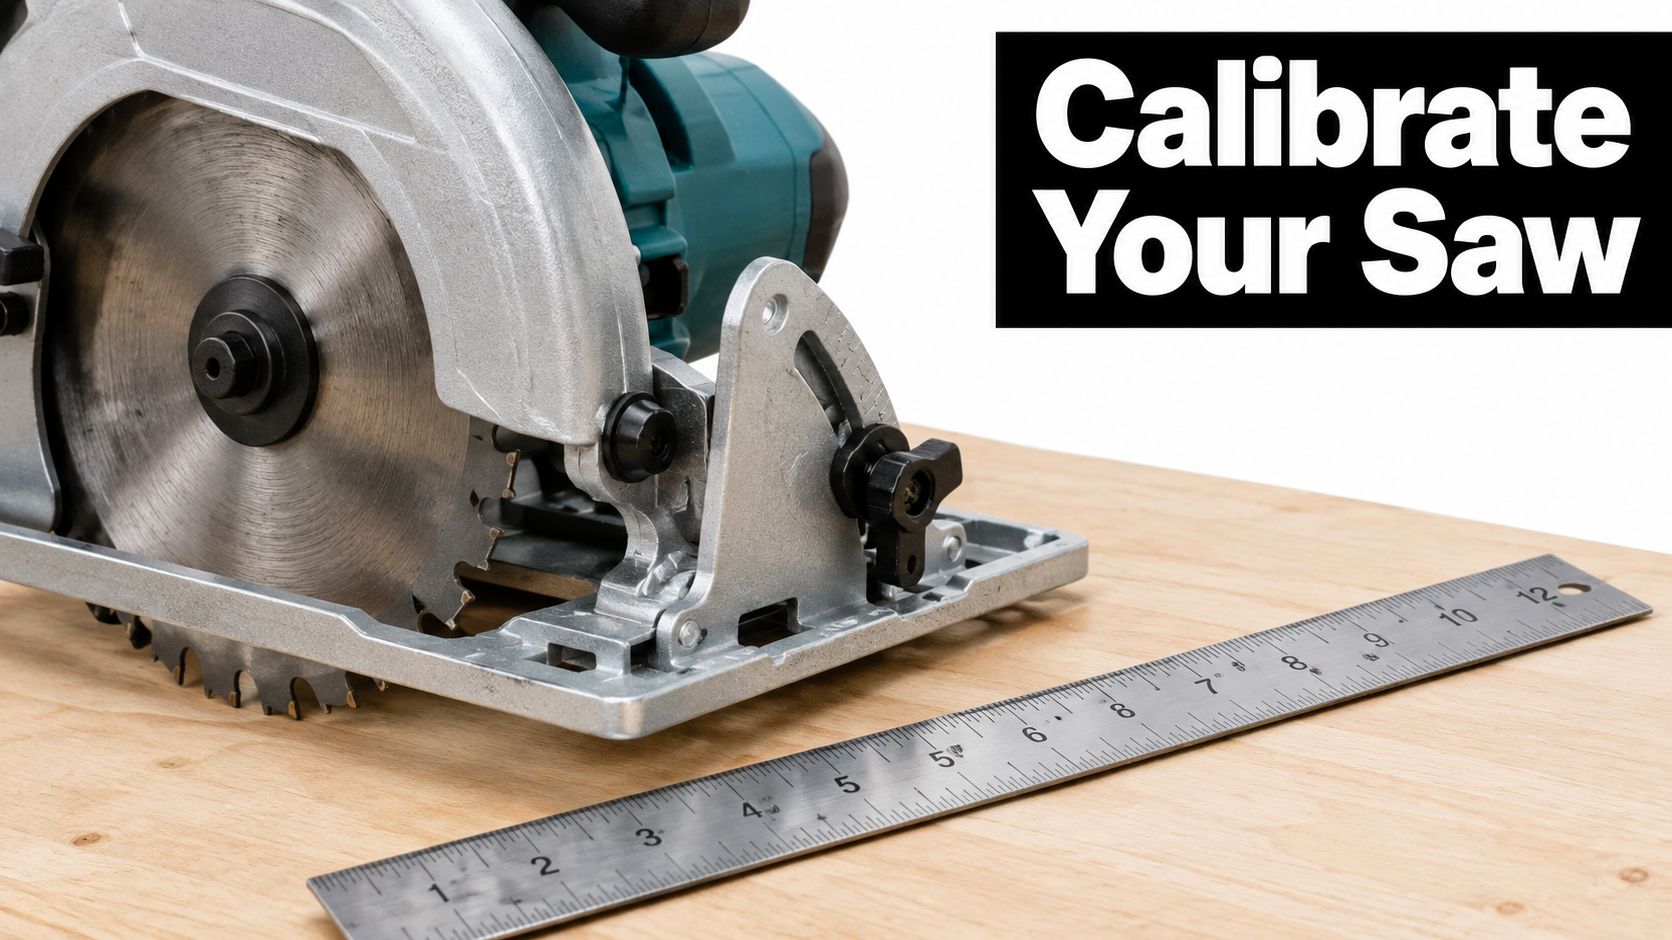
The five-minute check that saves a sheet
Measure both front and back of the shoe edge to the blade. You're looking for consistency. If the numbers don't agree, something's off. The shoe may be bent, the blade may not be seated right, or the saw may have taken a drop out of the truck at some point.
Then check these before you build or clamp any guide:
- Depth lock: Make sure the depth lever holds without slipping when you press down on the saw.
- Bevel lock: Set it, tighten it, then try to move it by hand. If it creeps, your bevel cuts will wander.
- Blade condition: A chipped or pitch-loaded blade drifts more than you think.
- Front indicator notch: If the reticle on the shoe is bent, ignore it and trust your measured offset.
- Shoe flatness: Put it on a known-flat surface and look for rock or twist.
This Old House's method gets the core build right. Mark the fence line at about 1/2 inch more than the saw's offset, glue and fix the fence, then trim both edges with the saw so the guide self-registers to that exact tool geometry (This Old House circular saw guide build). That trimmed edge becomes truth. Not your pencil line. Not the notch on the front of the saw.
Practical rule: If you haven't measured blade-to-shoe offset on your saw, you're still guessing.
In Central Valley summer heat, cordless saws can get sloppy when dust packs around the shoe and the battery gets hot sitting in the bed box. That's one reason compact saw choice matters if you're working overhead or moving room to room. If you're comparing smaller models before building a guide around one, this rundown of a compact circular saw is worth a look.
If you're at the planning stage and still sorting project scope, lumber, labor, and whether to DIY or subcontract pieces of the job, this guide to budgeting and hiring contractors is useful background before you start buying material you might cut wrong the first time.
Match the Blade to the Material
A straight guide won't fix the wrong blade. If the blade is wrong for the cut, you'll get tear-out, burning, slow feed, or all three. Homeowners usually focus on the saw. Contractors know the blade decides most of the finish.
Keep it simple. Use one blade for rough framing and one for cleaner finish work. Don't chase a so-called universal blade and expect it to rip studs cleanly and leave cabinet-grade edges on plywood.
Blade Selection by Material
| Material | Tooth Count | Grind | Best Use |
|---|---|---|---|
| 2x lumber rip cuts | 24-tooth | FTG | Fast ripping with the grain |
| General framing crosscuts | 24-tooth or 40-tooth | FTG or ATB | Rough framing or cleaner crosscuts |
| Pine and poplar finish cuts | 40-tooth | ATB | Cleaner crosscuts and trim work |
| Plywood | 60 to 80-tooth | High ATB | Sheet goods with reduced tear-out |
| MDF | 60 to 80-tooth | High ATB | Cleaner panel cuts |
| Melamine and laminates | Fine tooth blade | TCG | Reduced chipping on hard surfaces |
| Composite decking | Fine tooth blade | TCG | Better edge quality on composites |
What actually works on site
For ripping construction lumber, a 24-tooth framing blade clears sawdust fast and doesn't bog down as easily. For crosscuts and general purpose finish work, a 40-tooth ATB blade is the usual sweet spot. When I'm breaking down plywood or MDF and want the face to stay cleaner, I go finer.
ATB blades shear fibers better on crosscuts. FTG blades are better suited to ripping. TCG earns its keep on laminates and other chip-prone surfaces. That's not theory. It's why two saws with the same motor can leave very different edges.
Don't ask one blade to do every job. That's how you end up sanding saw marks off material that shouldn't have needed sanding.
There's also a setup piece that gets overlooked. The guide has to account for the blade you're running. A neutral woodworking guide lays it out plainly. Measure from the saw's base plate or shoe edge to the blade edge, then clamp the straightedge that same distance away from the intended cut line so the blade lands on the mark (Woodworking Advisor on offset and clamping).
Pros, cons, and ideal users by blade type
-
24-tooth framing blade
- Pros: Fast feed, good chip clearance, suited to rough lumber.
- Cons: Rougher edge, more tear-out on sheet goods.
- Ideal user: Framer, deck builder, DIYer cutting studs or joists.
-
40-tooth finish/general blade
- Pros: Better edge quality, solid all-around choice.
- Cons: Slower on heavy rips, can burn if pushed wrong.
- Ideal user: Homeowner who wants one practical starting blade.
-
60 to 80-tooth plywood blade
- Pros: Cleaner face cuts on plywood and MDF.
- Cons: Slower feed, less forgiving in dirty framing stock.
- Ideal user: Cabinet installer, trim carpenter, careful DIYer.
Measure and Mark Without Second-Guessing
Bad marking wastes more time than cutting. On site, speed comes from layout that survives dust, glare, and a saw shoe covering half the line. If your mark disappears under the base, you're guessing again.
Use a sharp carpenter pencil for rough work and a knife line when the fit matters. Extend the line all the way across the board or panel so you can see where the blade enters and exits. On long stock, snap a chalk line instead of trusting a tape stretched across a bowed sheet.
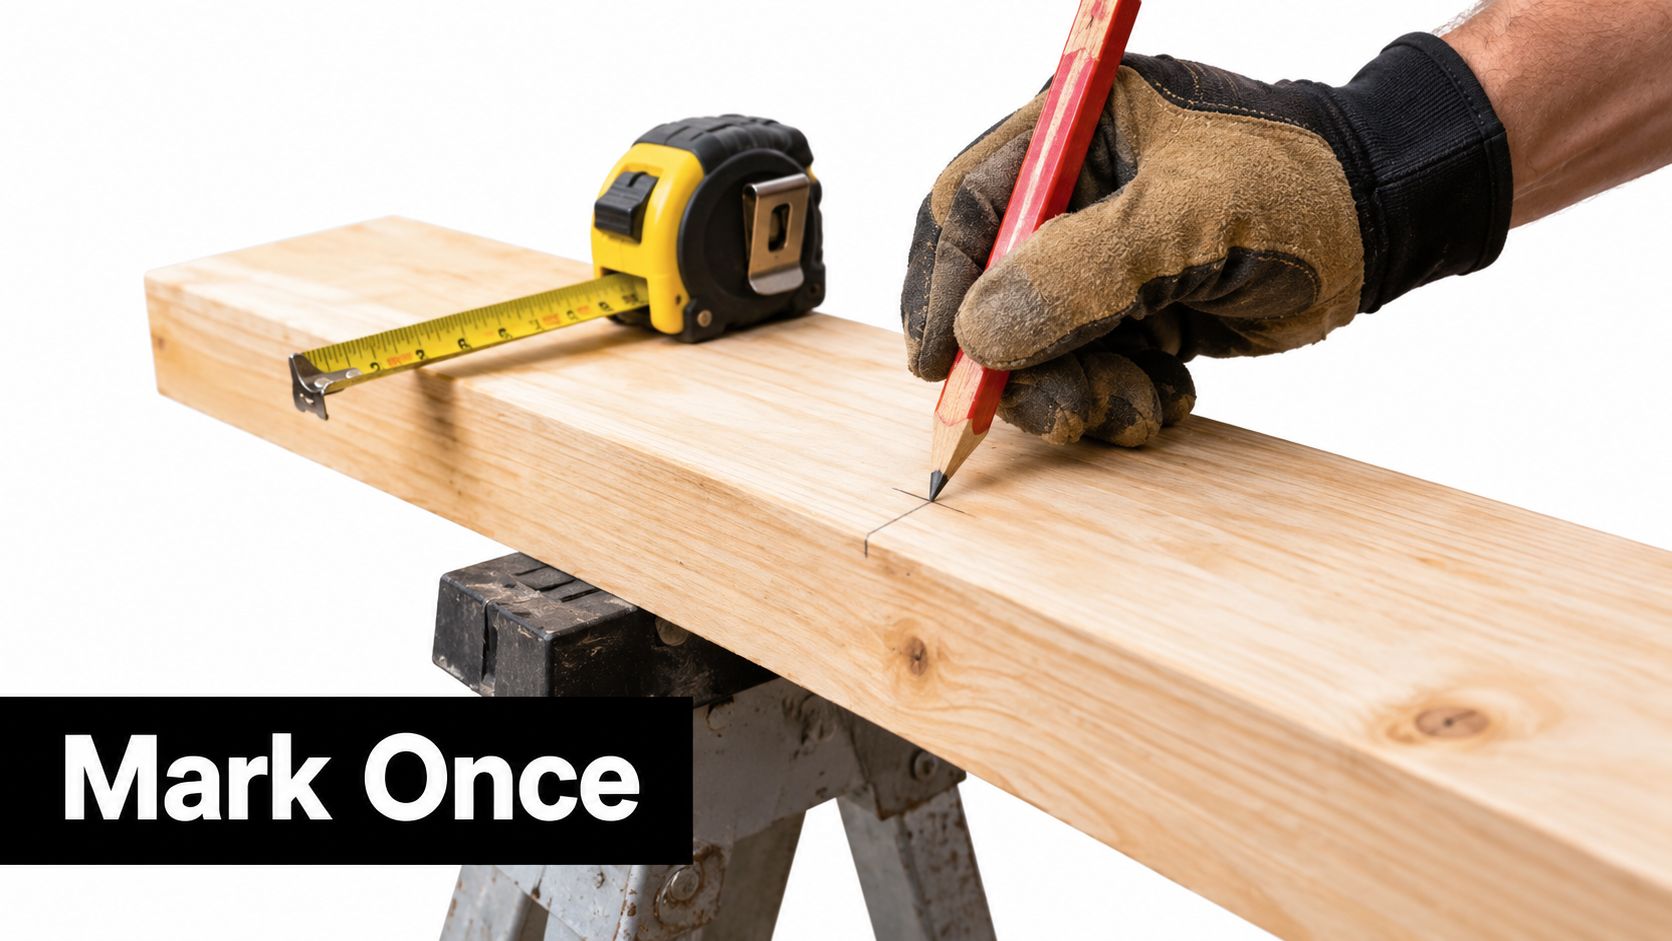
The clamp sequence that keeps the cut honest
Clamp the workpiece first. Then clamp the guide on the waste side of the line after accounting for offset. That matters because the guide is controlling the saw shoe, not the blade itself.
A practical homemade guide usually starts with plywood, MDF, or hardboard for the base. One build source specifies a base about 8 to 12 inches wide and a few inches longer than the intended cut length, often 4 or 8 feet for sheet goods, with a factory edge used as the master reference before trimming the guide to the saw's exact path (DIY guide dimensions and build method).
Set the blade depth only slightly deeper than the material. Home Depot's guidance says set depth about 1/4 inch below the material, and other DIY guidance echoes the rule of roughly one to two teeth beyond the workpiece (Home Depot circular saw setup). Too much blade showing increases tear-out, kickback risk, and drag.
Marking habits that hold up
- Square the line: Use a speed square or a verified factory edge.
- Support the cutoff: Don't let the waste piece pinch the blade.
- Check clamp clearance: Make sure the motor housing won't hit the clamp heads halfway through.
- Mark the waste clearly: A quick X saves expensive mistakes on finish panels.
In bright Sacramento sun, a fat fuzzy pencil line on OSB looks fine until the dust starts flying. Then it vanishes. A clean line and a guide edge you can trust are easier to follow than trying to read a crooked mark through sawdust.
Cut Techniques That Actually Track Straight
Straight cuts, bevel cuts, and plunge cuts are three different jobs. Treat them the same and the saw will remind you fast. The guide helps on all three, but the setup changes.
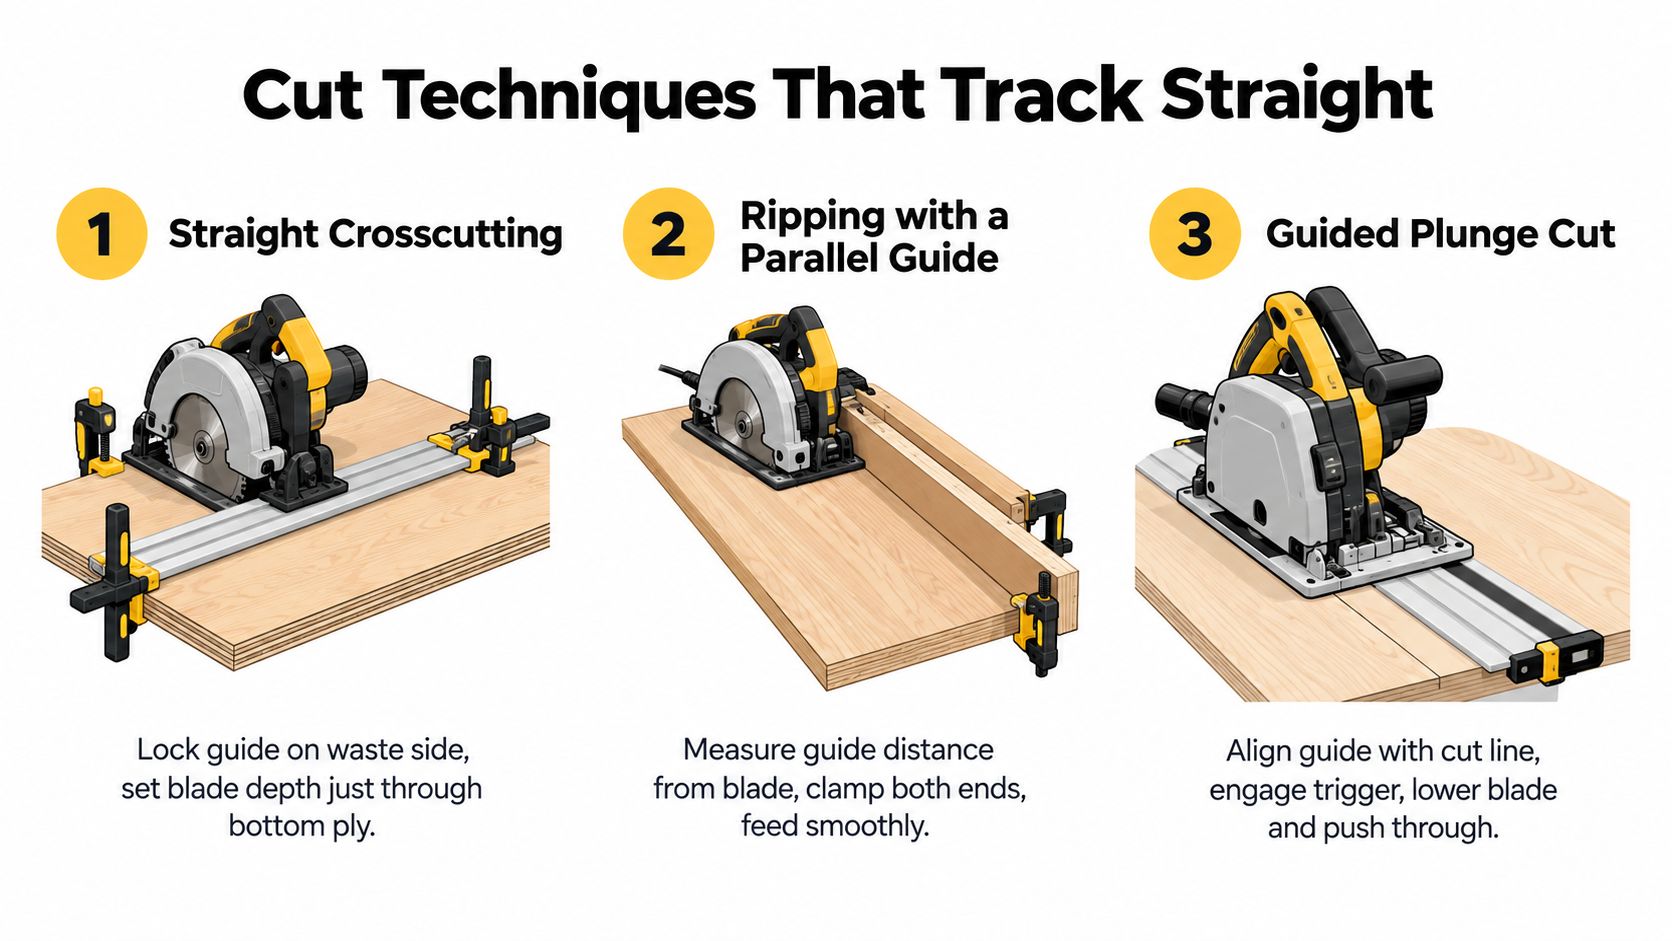
Straight crosscuts and long rips
For a normal guided cut, clamp the guide on the waste side, set the blade just past the bottom face, start the saw, let it reach full speed, and keep the shoe flat against the fence through the whole pass. Don't steer by the blade. Steer by keeping side pressure on the guide and feeding at a pace the saw accepts.
A simple calibrated straightedge is one of the best low-cost alternatives to a track saw when you're breaking down plywood. Several guides frame it exactly that way: low cost, fast setup, and useful for repeatable rips and crosscuts on sheet goods, with the main trade-off being that it demands careful measuring and won't match the convenience of a purpose-built track system (This Old House House One guide).
Bevel cuts need a different mindset
The second you tilt the shoe, your reference changes. Don't assume the same guide position still applies. Verify the bevel setting with a square, lock it down hard, and make a test cut in scrap if the angle matters.
On bevel cuts, the blade wants to favor the low side if you rush the feed. Keep steady pressure against the guide and don't crowd the saw. A bevel cut that starts straight can still wash out by the end if the shoe isn't fully planted.
Keep your eyes on the front portion of the shoe and the kerf shadow. That tells you more than staring into the blade guard.
Plunge cuts are where people get loose
A guided plunge cut takes more control than a regular edge cut. Tip the saw forward on the front of the shoe, align carefully, bring the blade to speed, then lower it into the sheet under control. Once the blade is down, keep the base flat and continue with the guide doing the steering.
The common mistakes stay the same across all three cuts:
- Mismeasured offset: The guide is straight, but the cut lands wrong.
- Clamp interference: The motor housing or guard hits a clamp mid-cut.
- Wrong side of the line: You cut the keeper, not the waste.
- Pushing too hard: The saw starts to wander off the fence.
A good circular saw cutting guide DIY build isn't complicated. The discipline is in making each setup match the cut type instead of pretending one clamp job covers everything.
Habits That Ruin Accuracy and How to Break Them
Most bad cuts come from operator habits, not cheap tools. I see the same ones over and over. Guys force the saw, stand right behind it, bury too much blade below the stock, then blame the guide when the cut drifts.
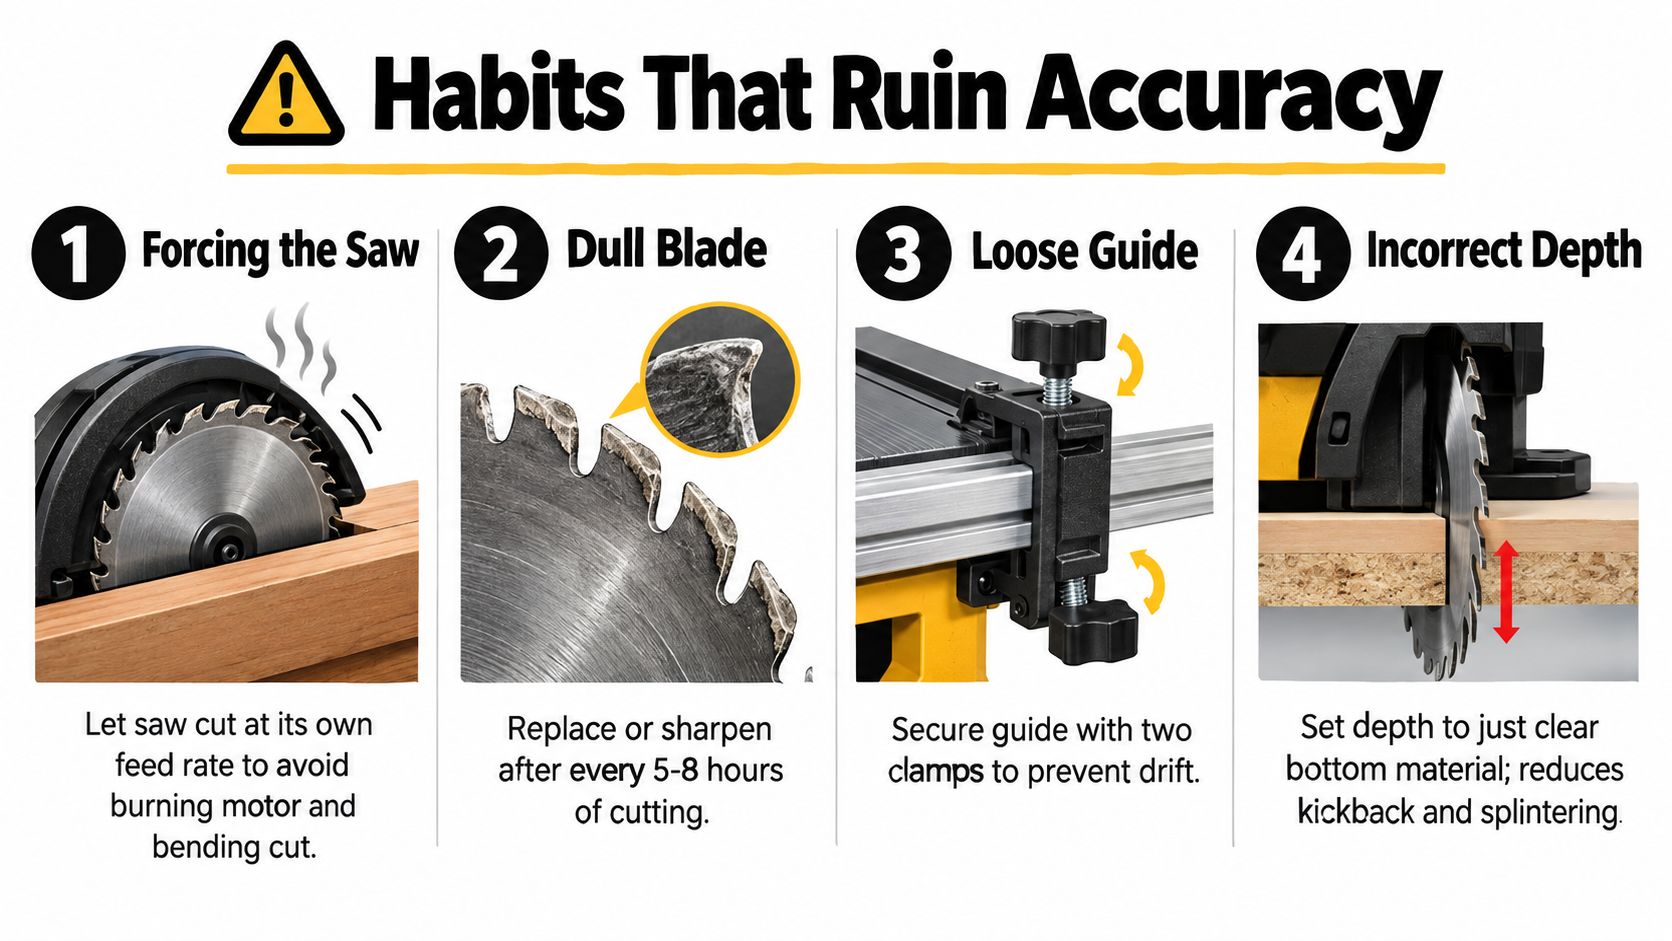
Forcing the feed is the first one to kill accuracy. The saw already tells you what pace it wants. If the pitch changes hard, you're pushing too much. Excess blade exposure makes that worse, which is exactly why expert guidance limits protrusion to about 1/4 inch past the underside of the material, or roughly one to two teeth beyond the workpiece, to reduce tear-out, kickback risk, and motor load.
Another bad habit is peering down the blade line and twisting your shoulders to do it. That body position pulls the saw off the fence. Stand offset from the cut path and sight along the front few inches of the shoe instead.
Here's a useful visual if you want to compare your own habits against proper setup and feed:
Four corrections that clean up most cuts
- Stop reversing into the cut: If the blade binds, back out only as needed and reset. Don't rack the saw around inside the kerf.
- Tighten the guide properly: A loose straightedge defeats the whole point of the setup.
- Use a sharp blade: A dirty or dull blade invites wandering, burning, and rough edges.
- Let the saw reach speed first: Entering the material before full speed makes the first inches ugly.
If your blades are loading up with pitch or just cutting rough, this practical piece on saw blade sharpening and maintenance is worth reading before you assume the saw itself is the problem.
Who this is for
- DIY homeowners: Breaking down plywood for shelves, workbenches, sheds, or fencing.
- Handymen: Clean, repeatable cuts without hauling a full track saw system.
- Contractors: Fast rips and crosscuts on sheet goods when jobsite conditions are dusty and rough.
- California crews: Workers who commonly bounce between English and Spanish tool terms like bare tool / herramienta sola, impact driver / atornillador de impacto, and brushless / sin escobillas.
Who should avoid this
- Cabinet shops chasing track-saw precision every day: A dedicated rail system is faster.
- Anyone unwilling to measure offset carefully: This method works only if the guide matches the saw.
- Users with damaged shoes or unreliable bevel locks: Fix the saw first or you'll build error into every cut.
Gear Up Without Overpaying
You don't need a premium cordless setup to cut straight on a weekend project. For most homeowners, a solid corded saw, one rough blade, and one cleaner blade will do the work. Straight cuts come from setup and blade choice more than price tag.
Where money gets wasted is platform chasing. A first-time buyer grabs a bare tool because the sticker looks better, then still needs charger and batteries. In summer around Sacramento and the Central Valley, those batteries also deal with heat soak. Leave them cooking in a truck at lunchtime and runtime drops when you need to cut.
What's worth buying first
Start with a dependable 7-1/4 inch saw if you're cutting plywood, framing lumber, and general project stock. That format is practical for the work most homeowners do. Pair it with one framing blade and one cleaner finish blade and spend the rest on clamps, a straight guide, and decent hearing and eye protection.
If you're comparing add-ons that make a standard circular saw more useful, this guide to circular saw attachments helps sort out fences, guide rails, and support accessories without overbuying.
Pros, cons, and ideal buyer types
| Option | Pros | Cons | Ideal User |
|---|---|---|---|
| Corded 7-1/4 inch saw | Steady power, no battery heat issues, good for long cuts | Needs extension cord | Homeowners, remodelers, deck work |
| Cordless 7-1/4 inch saw | Mobility, cleaner setup, good for punch-list work | Battery management matters in hot weather | Pros moving room to room |
| Bare tool / herramienta sola | Lower upfront tool-only cost if you already own the platform | Useless without battery and charger | Existing platform users |
| Open-box saw | Better value if inspected and complete | Must verify condition and included parts | Budget-minded buyers who check gear carefully |
One practical buying route in the Sacramento area is Value Tools Co in Elk Grove. The useful part isn't hype. It's that the tools are tested and inspected, there's a 30-Day Peace of Mind Guarantee, returns can be handled by mail or in-store, defective items get free return shipping, and open-box or bare-tool inventory can save buyers up to 55% off typical retail pricing. For somebody trying to build a circular saw cutting guide DIY setup without paying full retail for every piece, that's a straightforward option. Same-day Elk Grove pickup also helps when a project is already laid out on sawhorses and you don't want to wait on shipping.
If your project list includes tile after the framing or sheet-good work, it also helps to rent specialty gear instead of buying every niche tool. This guide on how to find tile cutter for hire is a practical example of where rental makes more sense than ownership.
Common Questions From First-Time Buyers
Can a 7-1/4 inch circular saw handle normal homeowner projects
Yes. A 7-1/4 inch saw is the standard practical size for most homeowner work. It handles plywood breakdown, framing lumber, deck boards, and general remodel cuts well. If you're building a guide for one saw, this is usually the most flexible platform to build around.
Should I buy a cordless saw or a corded saw first
Buy corded first if you mostly work at home near power. Buy cordless if mobility matters more than anything else. In Central Valley heat, cordless runtime can sag when batteries sit hot, so battery care matters more in summer than people expect.
What blade should I buy first
Start with a 40-tooth ATB blade if you want one blade that covers framing crosscuts and one trim job reasonably well. Add a 24-tooth framing blade if you'll rip lumber regularly. If plywood edge quality matters most, step up to a finer plywood blade next.
What does warranty usually cover and what gets denied
Warranties usually address defects in the tool itself, not wear items or damage from misuse. Blades, normal wear, bent shoes from drops, and damage from forcing the tool often fall outside coverage. Read the actual store and manufacturer terms before assuming a rough-running saw qualifies.
Do I need a track saw to make straight cuts
No. A calibrated straightedge guide works well for sheet goods and long rips if the offset is measured correctly and the saw shoe stays tight to the fence. A track saw is faster and more convenient, but it isn't the only way to get repeatable straight cuts.
Is a homemade guide safe
It can be, if it's built from flat stock, clamped securely, and matched to your saw's offset. Safe use still depends on proper depth setting, support under the work, keeping the shoe flat, and not forcing the cut.
FAQ schema markup
If you need the saw, blades, or a bare tool / herramienta sola to build this setup without paying full retail, Value Tools Co is a practical local option. They carry tested and inspected tools, offer a 30-Day Peace of Mind Guarantee, and the Elk Grove pickup option helps when you need gear the same day instead of after the lumber's already laid out.


